

This post has been a while in the making… After all, we did buy the barrels more than two years ago! This is a project that with a few tools and a few minutes, you should be able to do pretty easily too.
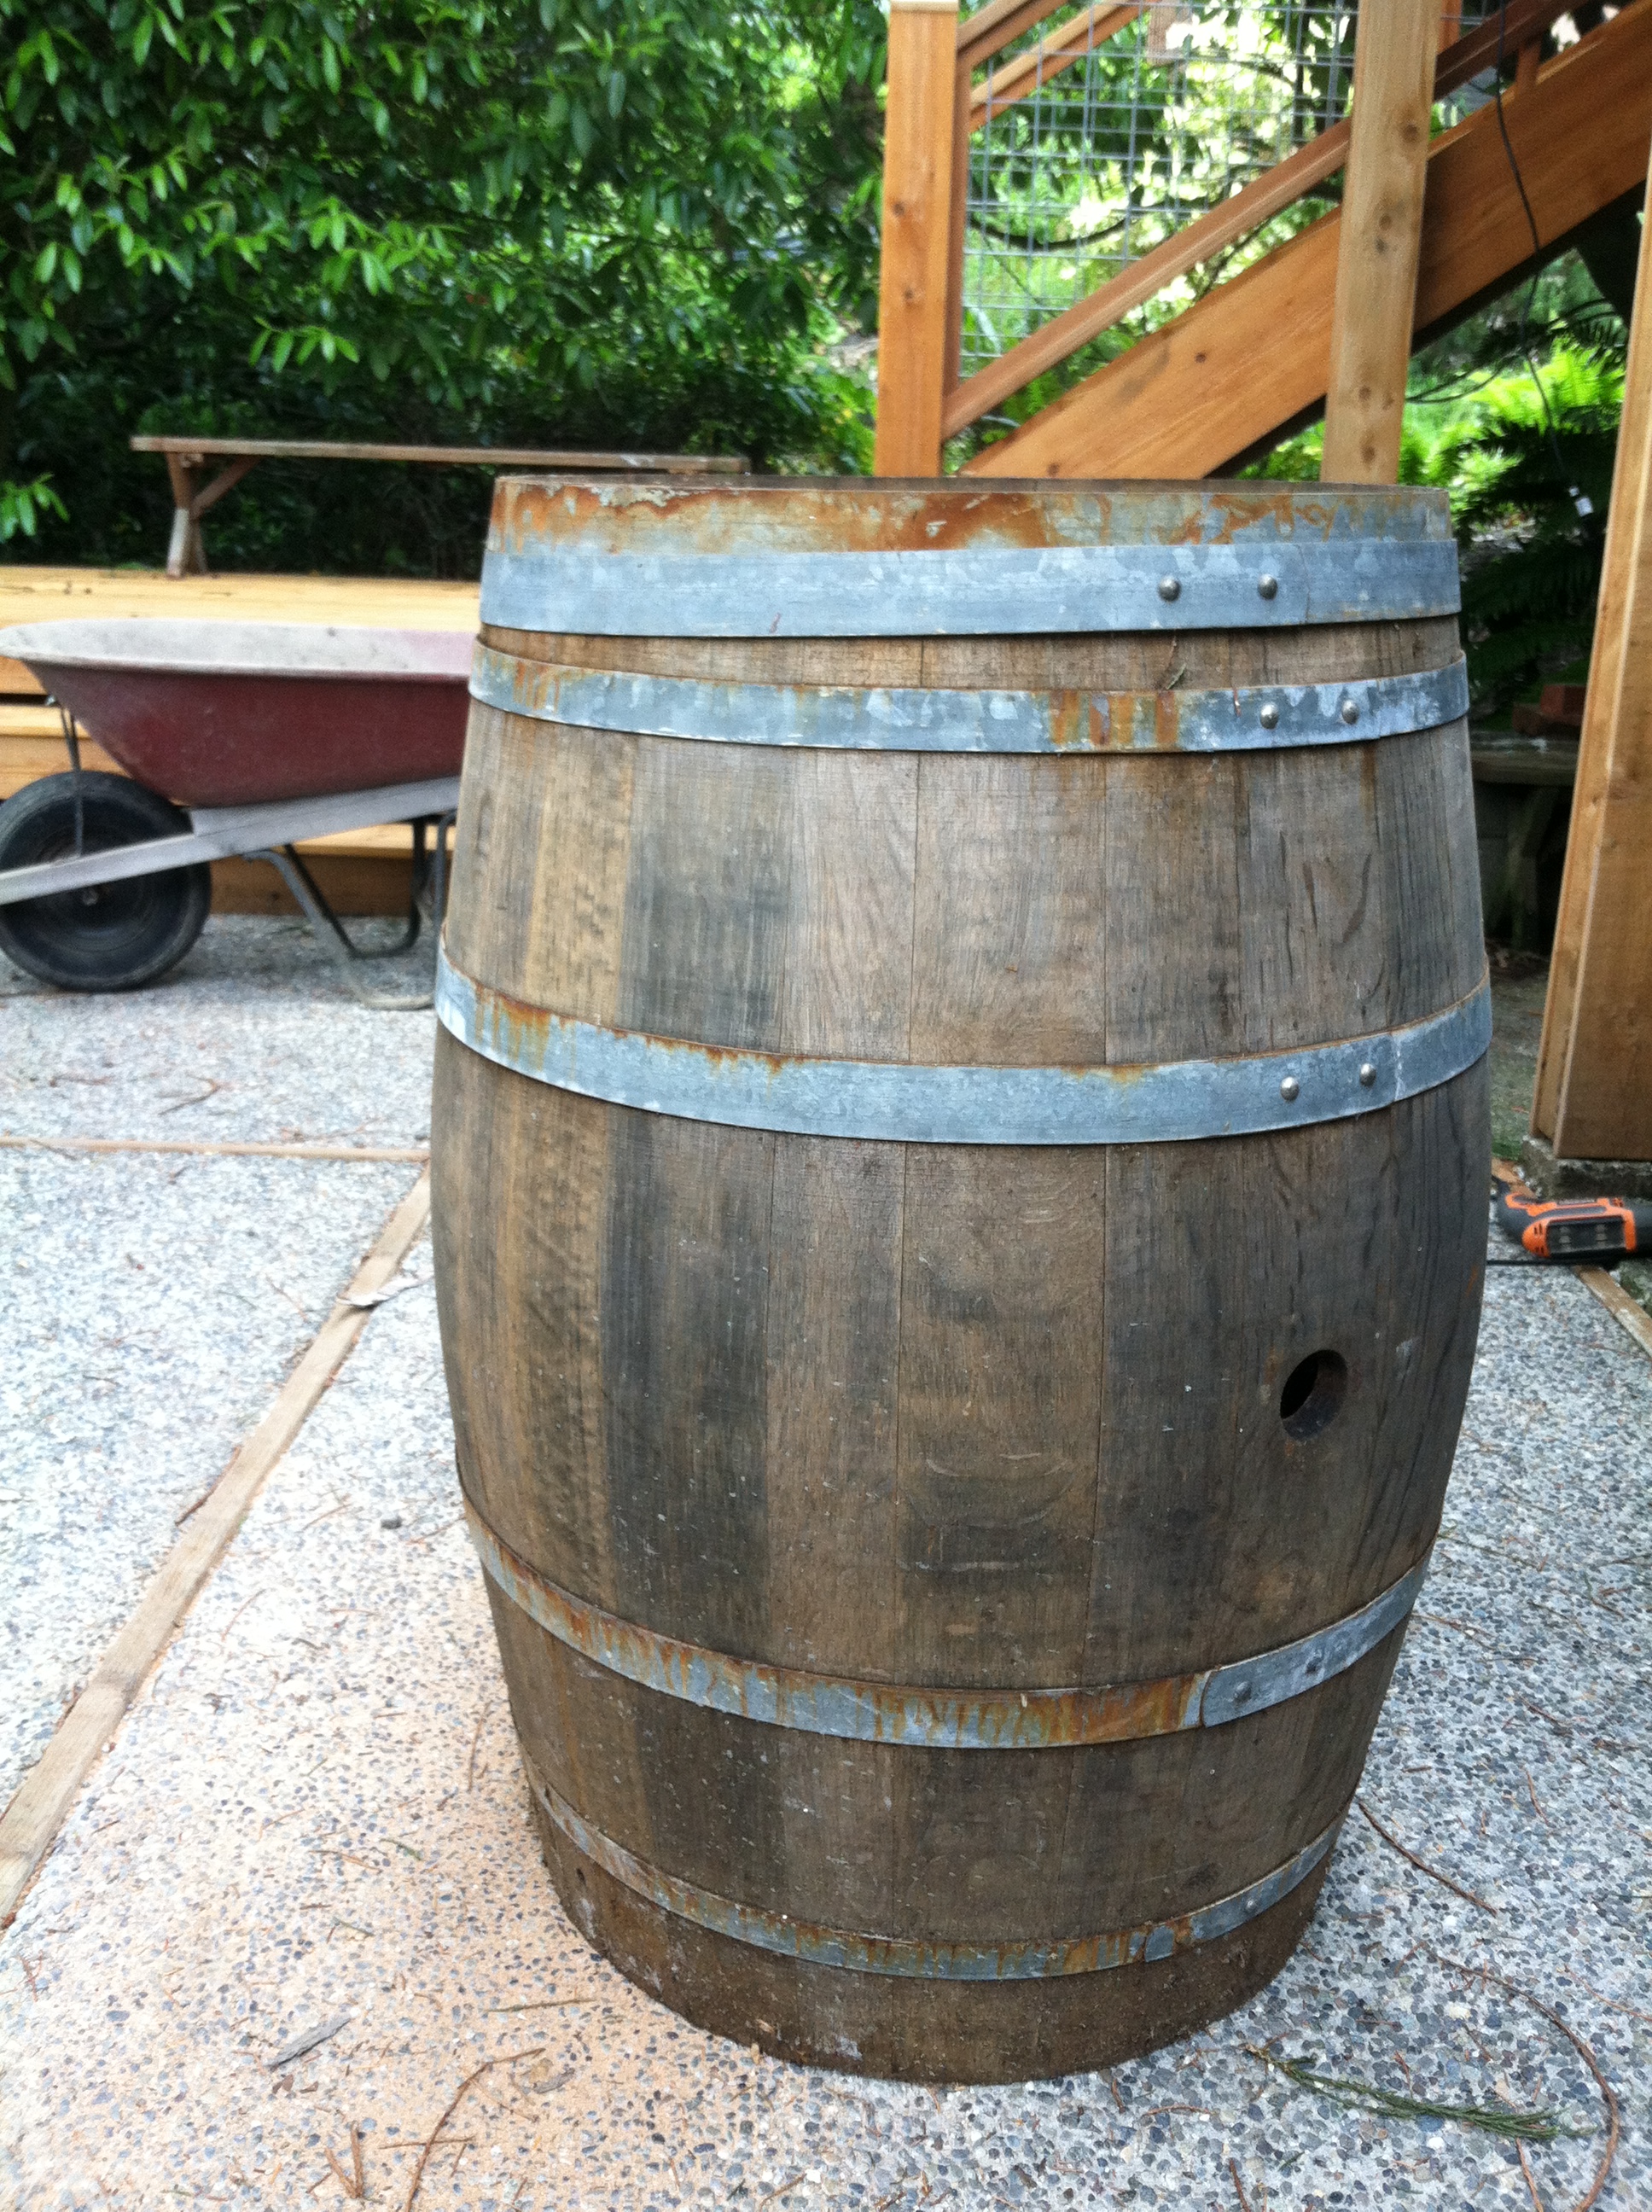
Wine barrel… Before
First, buy some wine barrels. We bought two many years ago from Efeste but you should be able to find some at your local winery. We paid $75 for two barrels and borrowed my parents’ Highlander to haul them back to Megan’s Island. What did we do next? We put on the patio and let them sit. For years. Next time I’ll take better care of them, so I have to spend less time cleaning them to get them spiffed up.
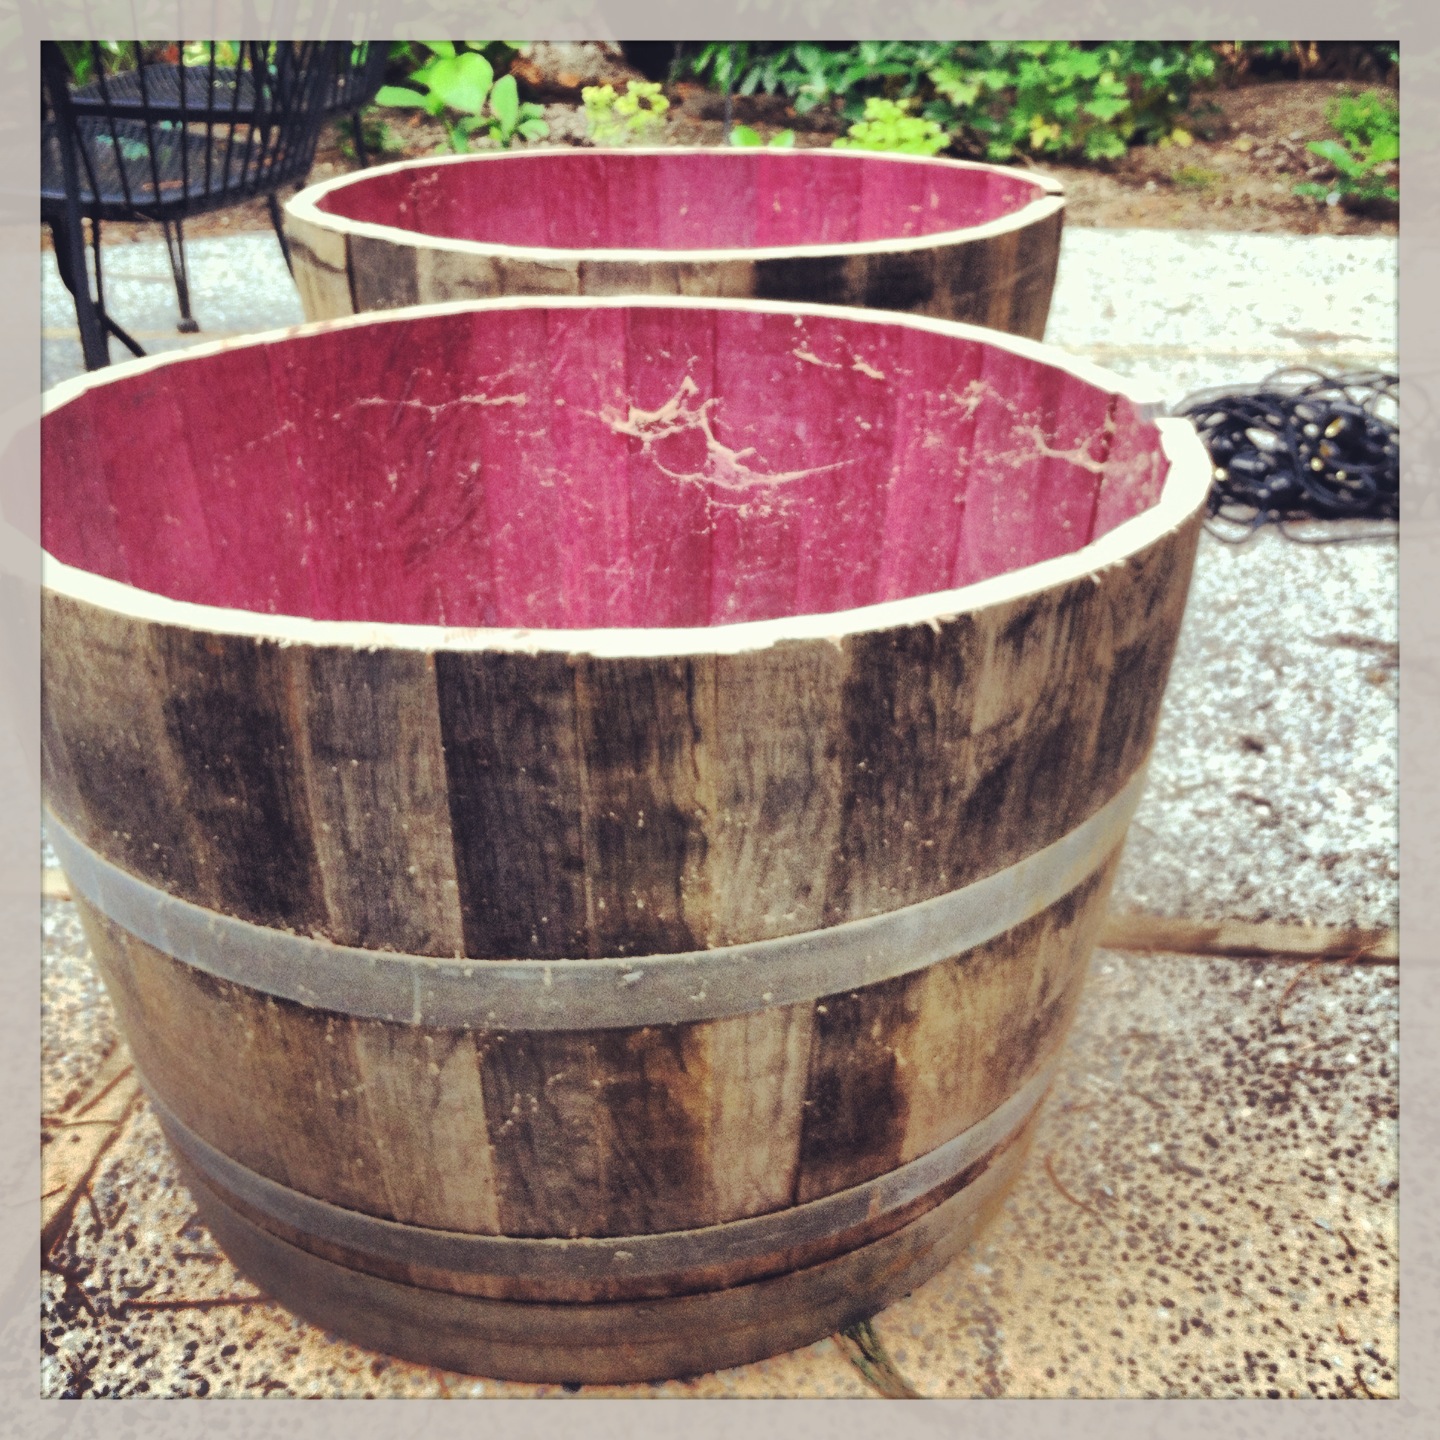
Next, decide what you want to do with them. I compile my ideas on my Pinterest page. For this particular project, I went with simple: cutting the barrels in half.
My Dad has all of the tools in the family (and the knowledge to go along with it) so we planned a wine barrel cutting date. He brought over his circular saw and he cut while Brandon and I rolled the barrel. We cut the first one straight across and I was so surprised to find a beautiful merlot color inside. (Duh. They’re WINE barrels.) Once I saw how cool and pretty they were inside, I decided to switch up the cut on the second barrel: oblong! (Ooooh! Ahhh!) My Dad was skeptical at first, but we tried it. And it worked SO WELL! I instantly fell in love with the oblong half barrels.
 Cutting the barrels was the easy part. Next came the cleaning. Oh, the cleaning. First, I sanded the edges. Brandon was the sanding expert but after busting through not one, two, three, four but FIVE sanding sheets (on four barrels, mind you), I’m now a whiz at removing and replacing the sanding sheets. (And then busting them again.)
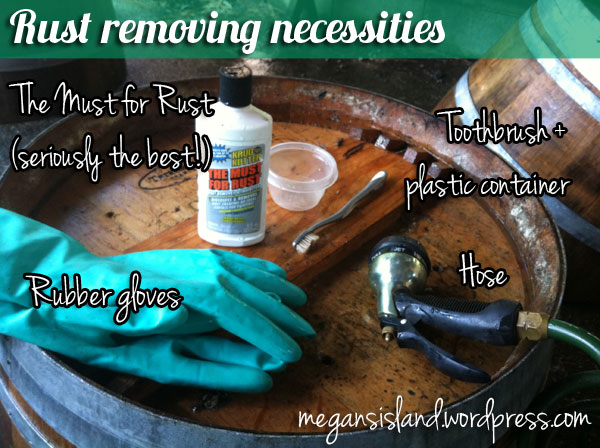
Once the edges were soft-ish and our cut marks were blended in, I started the process of making our aged barrels look brand new. First, I discovered “The Must For Rust,” a solution that truly is the must for rust. This stuff was AMAZING! So amazing, in fact, that I created my first video! Yay! (I’ll figure out how to post the video soon…stand by…)
The audio is a little rough, but basically I just show the camera that by applying the rust remover with a toothbrush and spraying it with water removed some pretty serious gross-ness. Here’s a before and after:

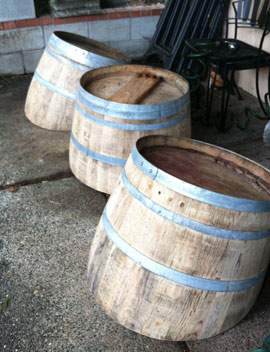
After the rust was removed, I got out the leftover 30-second outdoor cleaner from our deck-staining project. On went the gloves and I went to town on the barrels — the outside of the barrels only. The cleaner is essentially like bleach and really cleans whatever you’re cleaning. I had leftover cleaner, so I cleaned the random benches that came with our house. They’ve turned into a new project that I’ve started and am only half-way finished with. This is how the barrels looked after they were cleaned:
After letting the barrels dry overnight I woke up early to stain them. Unfortunately I discovered that I had unknowingly bought indoor stain. This wasn’t going to work for my planters, so it was off to Lowe’s I went. My impromptu Lowe’s trip was probably for the best, since I was able to pick out the perfect plants.
Back to staining. My staining technique worked surprisingly well, but I made an incredible mess. I’d recommend doing all of your staining work on a plastic drop cloth that you can throw away once you’re done. I didn’t do that and my next project will be trying to remove the brown stain from our concrete patio. I have some ideas. More on that in another blog post. So for the staining, I used a clean sponge and dipped it into the stain. I quickly discovered that gravity was my friend for this project and moved the barrels around with the drips. I also discovered that making a huge mess of the barrels (aka getting stain on the steel ring) and quickly wiping the stain off. It ended up being quite successful. I let the stain sit on the wooden parts of the barrel for just a few minutes and then wiped it off.
 This is what the barrels looks like half stained. I kind of like the two-tone look. Maybe for the next round of barrel planters that I make!
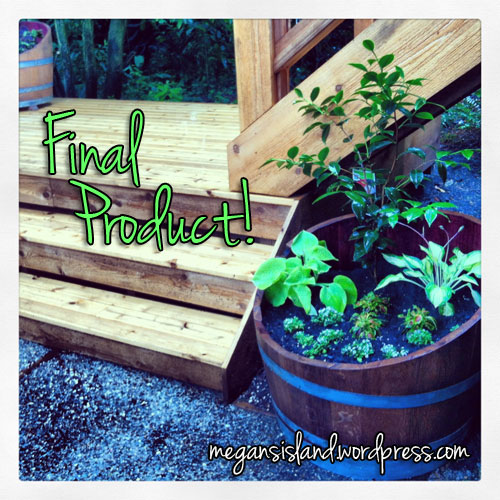
Once the barrels were stained, I used some spray paint lacquer inside to preserve the rich red color and planted them! I’m so, so, so excited with how they turned out. What do you think? Have I inspired you to do something fun with a wine barrel? We have many more ideas, so check back for more fun projects!
One word of warning: After spending a full weekend with the opened wine barrels turned me off a bit from wine. It seemed like stale red wine was the only thing I could smell for awhile! Don’t worry, the deterrence only lasted that weekend. I’m enjoying a Malbec as I type!

Those look so fabulous!
Thanks, Meg! I couldn’t be more pleased! We LOVE them!