The Handmade Project

Umm… did you know that my wildest dreams might actually come true?! It’s a long shot, but when Brandon forwarded me the application for The Handmade Project, a reality television show about crafting (!!!!), I knew that I had to apply.

It took three weeks for me to perfect my responses to the dozens of questions they asked, find my craft projects and photos, and to film just the right 3 minute video. The stars aligned last week and I submitted my application!

You have to apply to be chosen! Fingers crossed!!

I’ve never applied to a reality TV show before, but I’m guessing it’s a little bit of a popularity contest, so I’d really appreciate it if you could please watch, comment, and like my application video on YouTube, this blog post, and on my social channels. (Links in the top right!)

Who knows… you might be seeing me on the big screen in August!

Here are some highlights of my application, so you can know what you’re supporting:

My PR/introductory blurb:

During the day, Megan Szerwo is a real-life Leslie Knope, making her living working on behalf of the people of the City of Seattle. After hours though, Megan grabs a glass of her favorite red and she gets down to business on her real passion: crafting. A jack of all trades, Megan focuses her attention on party and holiday decor, gifts for new parents, and any and every craft possible with her endless supply of corks. Megan’s three passions in life are easily described: cats, crafts, and carafes! Megan lives in Seattle, Washington with her husband, son, and two cats.

And some of the projects that I highlight:

My Q13 debut!

My small business: Little Britches Bakery

Our homemade wood-fired oven in the backyard

My party pinatas

My mad party-throwing skills

Cork art!

And a couple of projects that are new to you as a blog reader:

Michael’s ONE HAPPY CAMPER first birthday party! I promise you’ll see it soon!

Muzzle Guzzler glassware: coming soon!

Fourth of July onesies! (Post coming only a year late, but in time for 7/4/17!)

Since it’s likely that this show would just perfectly foul up our Buffalo moving plans, it’s almost guaranteed to happen!

Don’t forget to watch my application video, tell all your friends to watch it, and like/comment on this post!

Thank you for reading and your unending support of my creative endeavors!

It’s football time!

‘Tis the season to get ready for football season! I’ve been gearing up on Pinterest and have compiled some of my football favorites here for you. We even went to a preseason faceoff between our hometown Seattle Seahawks and Brandon’s beloved Denver Broncos. (The Broncos won~ Go Broncos!) Baby-dependent, Brandon will be heading to the first home Husky game of the season on Saturday. I’ll be at home cooking something delicious. Maybe these ‘chos? {Better yet: pineapple and pork are supposed to induce labor!}

Since the season is long and we’ll have plenty of opportunities to share our tailgate and game day eats, I’m focusing on football crafts today. Specifically, AstroTurf crafts.

I had a lot of fun with AstroTurf last year, with my debut on Q13’s morning show.

Looked good on TV!

Looked good on TV!

I made koozies, coasters, platters, wine tags, “wreaths,” and more. {Full blog post and tutorial here} But those were so 2014.

Beer koozies

Beer koozies

AstroTurf platters: works with any size tile!

AstroTurf platters: works with any size tile!

AstroTurf wine tags

AstroTurf wine tags

One of my most favorite crafts to date: An AstroTurf W!

One of my most favorite crafts to date: An AstroTurf W!

For the 2015-16 season, I’ve purchased a new roll of AstroTurf rug and found some new ideas:

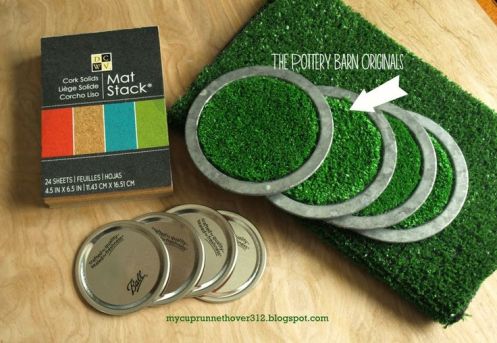
An upgrade on my coaster idea: circles!

An upgrade on my coaster idea: circles!

This AstroTurf table is pretty amazing

This AstroTurf table is pretty amazing

An AstroTurf bulletin board

An AstroTurf bulletin board

I have several ideas swirling in my mind right now, and potentially a couple more weeks of free time to act upon them, so check back for my new 2015 AstroTurf ideas! Happy football season to you! Go Huskies, Broncos and Seahawks!

Super Super Bowl snacks

training2

Yesterday I shared some super Super Bowl sips. To help soak up some of that booze, here are my super Super Bowl snack ideas.

Chili bar

Chili bar

Chili bar

Nacho bar

Nacho bar

Nacho bar

Football bowl 

Dip in a custom football bread bowl

Dip in a custom football bread bowl

A guac football field

A guac football field

A guac football field

Team-specific candied popcorn

Everyone loves popcorn!

Everyone loves popcorn!

And on to dessert!

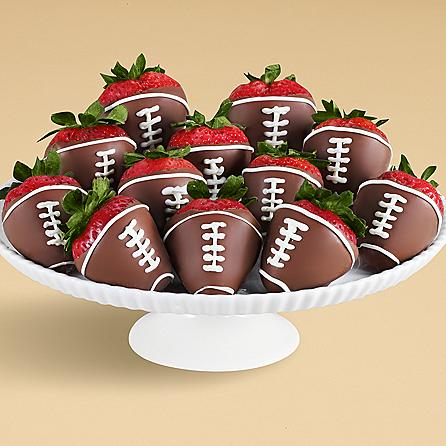
Chocolate-covered strawberries

Healthy, cute and delicious! The perfect combo!

Healthy, cute and delicious! The perfect combo!

Cupcakes!?

So many ideas!

So many ideas!

Chocolate peanut butter football cookies

Peanut butter + chocolate + football = Yes, please!

Peanut butter + chocolate + football = Yes, please!

Ice cream sandwich footballs!

So cute, so tasty!

So cute, so tasty!

Brownie footballs! (As featured on my Q13 segment to kick off the 2014-15 NFL season!)

Q13 tailgating segment

However you end up snacking, you know it’s going to be good! Let me know if you end up trying out any of these great ideas! Oh, and GO HAWKS!!

2014 in review

After a nice little break from the blog, spending time with friends and family, I’m BACK!

Here is our year in review: 2014 was a great year for the us, a year full of great wine, great food, great company and a whole lot of adventure.

2014-year-in-review

We started of the year with a New Year’s Day flight north. Way north. We spent the first few days of the year in the Arctic Circle, in the town of Bettles, to see the Northern Lights. (More here.)

Watching sunrise (about 11 a.m.) inside of the Arctic Circle, in Bettles, AK. (Sun set around 1 p.m.!)

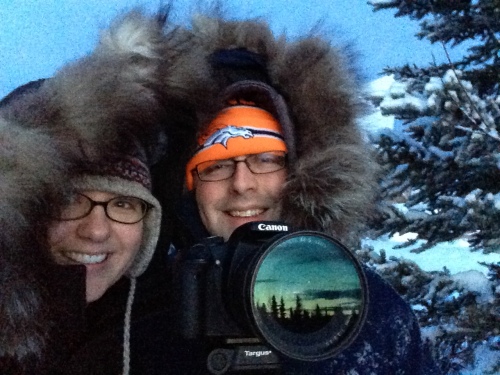
Watching sunrise (about 11 a.m.) inside of the Arctic Circle, in Bettles, AK. (Sun set around 1 p.m.!) Yes, our jackets are lines with wolf fur. No, they’re not ours.

From there, we had many more travel-required adventures for wedding celebrations: to New Orleans, Carmel-by-the-Sea, Flathead Lake, Montana, and Portland!

It wasn’t just wedding travel this year. We just returned from a pleasure trip to the Big Island of Hawaii. The trip was the perfect mix of relaxation and adventure: we tanned ourselves on the beach, snorkeled with manta rays, photographed a lot of Green Sea Turtles, opened the second-largest telescope (at nearly 14,000 feet on the world’s tallest mountain!), hiked the lava flows at the national park, and used our Northern Lights training to take night time photos of the world’s most active volcano. (I’m working on the blog post now!)

Here are some photos from the trip, to start your thinking about traveling someplace sunny and warm on this dreary winter day:

We spent the first part of our trip here, at the Mauna Lani hotel. It was gorgeous!

We spent the first part of our trip here, at the Mauna Lani hotel. It was gorgeous!

Our first sunset on the Big Island

Our first sunset on the Big Island

Sunset from our manta ray snorkel tour boat, outside of Kona

Sunset from our manta ray snorkel tour boat, outside of Kona

Sunset from almost 14,000 feet, at the Mauna Kea observatories

Sunset from almost 14,000 feet, at the Mauna Kea observatories

One of many turtles (and turtle photos) we saw on our trip

One of many turtles (and turtle photos) we saw on our trip

Black sand beach on the sound end of the Big Island

Black sand beach on the sound end of the Big Island

Macadamia nuts for days

Macadamia nuts for days

In August, I was featured as a ‘lifestyle blogger’ on one of Seattle’s morning television programs on Q13. Watch the clip here. It was another great adventure and hopefully the first television appearance of many.

Q13 tailgating segment

In addition to this blog and my day job, my part-time baby business, Little Britches Bakery, is flourishing this year. I shut down the website last spring and instead started selling via Etsy, seeing a great jump in orders this past year. Now it’s time for the shameless plug: if you’re shopping for new parents, check out Little Britches Bakery!

2014 was the year of the pizza for those of us on Megan’s Island. We finished Fatto a Mano (our wood-fired oven) in August and love, love, love it. We’ve perfected our foccacia and pizza crust recipes and will be trying out other dishes in the oven this year.

Finished pizza oven with Geroni-gnome, our watch'gnome'

Finished pizza oven with Geroni-gnome, our watch’gnome’

A wonderful shot of the flames leaping toward the pizza

A wonderful shot of the flames leaping toward the pizza

That’s about it for 2014. We’re closing the chapter on another stellar year for us and we’re looking forward to an even better year in 2015. I hope it’s a great year for you too!

Cheers to 2015! Thanks for reading!!

RIP hot glue gun

If you follow me on Instagram, you’ve already heard the news: I lost a dear old friend a few weeks ago: my hot glue gun.

RIP my dear old friend!

RIP my dear old friend!

This wasn’t just any hot glue gun. This gun has been by my side, my crafting companion since I was in middle school, many, many, many years ago.

In fact, I used this very glue gun when I worked on several years of Milk Carton Derby boats, gluing the milk cartons and jugs shut, so they were airtight.  I still remember that each gallon jug displaced 8 lbs of weight in the water. I’ll check with my parents for some of the old photos. We had very elaborate themes and boat designs.

Thankfully the glue gun held on through it’s big break on Q13. When it’s time did come,  it went out with a bang — literally — with a loud pop and a plume of smoke.

At least it made it on TV!

At least it made it on TV!

Here’s the new glue gun. The jury is still out on whether it’s a comparable model. It does a fine job gluing but it doesn’t have the same finesse as my old one. Don’t worry, I’ll keep on crafting… and I have a great project to share with you soon! Need a clue? AstroTurf!

My new hot glue gun: names needed!

My new hot glue gun: names needed!

Goodbye, summer

While I’m excited for the fall, today is a little sad: it’s the last day of summer. Between work and Brandon’s big test, we started summer a bit late, but tried to enjoy every minute of the short summer we did have.

Here’s a look back:

Visiting a new-to-me state: MONTANA for Brandon’s brother’s wedding:

The happy couple

The happy couple

A mama mountain goat and her baby at Glacier

A mama mountain goat and her baby at Glacier

We weren’t able to make it raspberry picking, but the blueberries were delicious!

Blueberry picking in North Bend

Blueberry picking in North Bend

I WAS ON TV!!!! And crafted with a new medium: AstroTurf!

Looked good on TV!

Looked good on TV!

The pizza oven finally became a reality!

A wonderful shot of the flames leaping toward the pizza

A wonderful shot of the flames leaping toward the pizza

We visited Carmel for another wedding, more wine and wonderful extended family time:

We visited Carmel

We visited Carmel

We gardened and grew basil-mint! And figs. And lots of herbs. Next year we’re going to have raised beds and plant lots of veggies!

Our basil-mint bush

Our basil-mint bush

We enjoyed Seafair, the Blue Angels (from land and sea!) and had a nice little staycation. (I forgot about that post and re-discovered the photos in my phone. I’ll work on that post next!)

SeaFair 2014: The Blue Angels from I-90

SeaFair 2014: The Blue Angels from I-90

Have a wonderful last day of summer — we’re going to grill some kalbi steaks for steak salads.

We’ll see if we can’t enjoy a few more dinners out on the patio. Cheers to fall!

My happy place: Our backyard

My happy place: Our backyard

My Q13 debut with tailgating treats and crafts!

I woke up early on Friday and made my way to the Q13 studio for my debut. It went really well and hopefully I’ll be back for future segments!

In case you missed it Friday morning, here is the segment:

Q13 tailgating segment

Find more information, including recipes, templates, and step-by-step instructions on the blog!

Here are some photos from my big morning. A very special thank you to my friend, and regular blog reader, Megan, for her help with the prep and execution of the segment. I couldn’t have done it without you!!

All set up on the weather deck

All set up on the weather deck

Watch out! Live microphone! Thanks, Walker.

Watch out! Live microphone! Thanks, Walker.

Cracking up Kaci -- maybe we were talking about frosting laces?

Cracking up Kaci — maybe we were talking about frosting laces?

Photo of the spread by Travis

Photo of the spread by Travis

My first "tease"

My first “tease”

Looked good on TV!

Looked good on TV!

And we're live in 3...2...1!

And we’re live in 3…2…1!

Thank you for reading! Have a wonderful week!!


Tailgating crafts: Fun with AstroTurf

The craft portion of the spread

The craft portion of the spread

Are you a new visitor from Q13? Welcome! Please, look around and stay awhile! Enjoy!

I was honored to share my tailgating crafts this morning on our local morning show on Q13, along with some delicious desserts:

Today is the Seahawks pre-season home opener against the San Diego Chargers. In anticipation of this game and the so-close-we-can-taste-it football season, I’m here to offer some great ideas, courtesy of Pinterest and my imagination.

I started off by picking up a 6′ x 8′ roll of AstroTurf from Home Depot. (Yes, 48 SF of bright green plastic rug!) When you’re picking up your AstroTurf, make sure that it’s backed in rubber, not the one that’s in a huge roll in the carpet section that needs to be applied with glue. The rubber-backed version has a black backing and is a lot more flexible. The whole roll was on sale and cost ~ $18.00.

It’s best to do all of these projects outside or in a space that’s easily cleaned, as cutting AstroTurf is messy business.

Now, time for some crafts:

AstroTurf Platter

  • 12″ x 12″ tile from Home Depot ($0.68) — or whatever size tile you want!
  • Hot glue gun + extra glue sticks
  • Scissors
  • Exacto knife (optional)
AstroTurf platters: works with any size tile!

AstroTurf platters: works with any size tile!

Place the tile on an upside-down piece of turf. Cut around the tile, about 1/2″ from the border of the tile. When you’re cutting, be sure to cut along the lines (less messy this way). It’s not the end of the world if you cut outside of the lines.

Take the cutout piece and liberally glue the top of the tile to the bottom-side of the AstroTurf. Press it flat. Glue along the tile edge and fold the AstroTurf overhang along the tile edge, similar to wrapping a present. Cut off any extra with an Exacto knife. Flip over your tile platter and VOILA! AstroTurf magic. This platter would be perfect for a football tailgate or viewing party, and would also work for a golfing-themed party.

This simple design is really versatile and works for any size of tile. I also used a 5″ x 5″ tile, in which I flipped the tile and glued the AstroTurf to the backside of the tile. You’ll see here that I stacked my two platters on top of one another with wine corks.

What’s that on top of the platters? Skittles vodka!
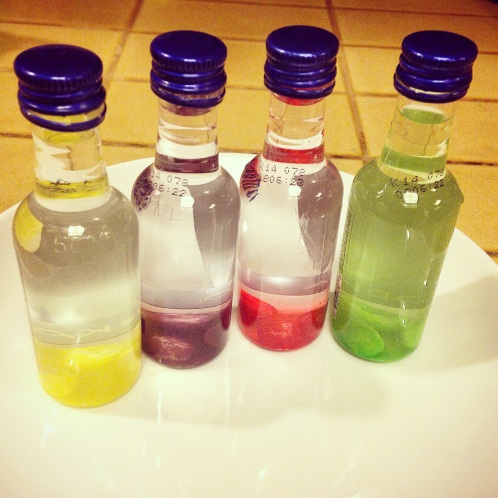
Skittles vodka! Given some time, these will be vibrant

Skittles vodka! Given some time, these will be vibrant

Skittles are the (un)official candy of the Seahawks and appeared throughout my tailgating table this morning. Making Skittles vodka is super easy. I took the single ounce bottles of vodka and popped three of the matching color of Skittles into each of them. After three or so hours, a bright color will take over the bottle. There will be some sugar residue, so you can strain it off, or just drink it.

AstroTurf Coasters

  • 4″ x 4″ tile from Home Depot ($0.13 each) — or whatever size tile you want!
  • Sheets of felt ($0.33 each from Michael’s — they come in a variety of colors)
  • Hot glue gun + extra glue sticks
  • Scissors

Same idea as the platters above, with an extra step.

Measure and cut all of your pieces. Your felt should measure about 1/2″ beyond the tile in all directions. Cut your square of AstroTurf the same width as your tile.

Glue the tile liberally and place it in the middle of the felt. You can either glue the finished or unfinished side of the tile. Both will get covered up, so it doesn’t matter. Glue along the tile edge and fold the felt overhang along the tile edge, similar to wrapping a present. Once the glue has dried (less than a minute), add more glue to the top and press down your AstroTurf square.

My AstroTurf coasters: Customize your felt to match your team colors

My AstroTurf coasters: Customize your felt to match your team colors

Beer koozies

I have two koozie designs. Both are easy to make and both templates can be found on this PDF. (Astroturf templates)

Beer koozies

Beer koozies

Design A (without laces):

  • Cold, full can of beer (or soda)
  • AstroTurf cut to the specifications of Design A on this AstroTurf template
  • Hot glue gun, glue sticks

Roll the AstroTurf around the can. Glue a line along the XXX-marked edge of the grass-side of the AstroTurf. Overlap the excess and carefully press the sides together. The full cold can will work to your advantage here, as it won’t allow the hot glue to stick to it. Once the glue is cool to the touch, slide the koozie off of the can. It should fit snugly, but still be able to slide off.

Design B (with laces):

  • Can or bottle of beer (doesn’t need to be cold!)
  • AstroTurf cut to the specifications of Design B on this AstroTurf template
  • Hot glue gun, glue sticks
  • Small hole punch
  • White suede laces or white shoe laces (I bought 8 yards of suede laces for ~$6 at Michael’s)

Punch holes in the AstroTurf per the specifications on the template (Design B). Wrap your AstroTurf around the can or bottle to see how much room you need to leave. Cut a long enough (about 4 times the height of your can) strand of laces and thread it through the bottom punches. Pretend it’s a pair of shoes and lace it right up. Finish it on the top with a knot or bow.

Fancy!

Fancy!

Wine tags

But wait! There’s more! I made two variations on the wine tag as well.

You’ll need the following:

  • AstroTurf (cut as described below)
  • Small hole punch
  • White suede laces or white shoe laces (I bought 8 yards of suede laces for ~$6 at Michael’s)

The first comes without a template. Simply cut a shape out of your AstroTurf, punch a hole in it and thread some lace through it. Leave a long enough length that you can tie a bow around your glass. You can use a paint pen or stickers to put an identifier on the shape. I used a “K” for Kaci, the Q13 anchor I spoke to this morning.

AstroTurf wine tags

AstroTurf wine tags

The template for the second wine tag variation can be found on this AstroTurf template, with the koozie designs. Simply cut out the tag in the described shape. You can stop here, although I like punching holes on either side of the slit (and indicated on the template) and tying a white suede lace bow to keep the edges together.

And that’s it! Now, what else should I do with the 40 SF of AstroTurf that I have left?! This is my official warning to family and friends: you’re getting AstroTurf coasters and platters for Christmas!

I’ll leave you with my pretty finger, donned with a fancy SuperBowl ring and I’ll post the footage as soon as it’s online! Thanks again for stopping by!

Oh, hello, SuperBowl Ring!

Oh, hello, SuperBowl Ring!

Full disclosure: I rooted for the Broncos during the Superbowl. Brandon, my husband, was born in Denver and has been a Bronco fan his entire life. The Seahawks are a very close #2 for us and in any other circumstance, we would have rooted for them.