{WINE WEDNESDAY} Davenport Cellar’s Spring Release

WineWednesday

As you know, Brandon and I love our wine. We discovered Davenport Cellars a few years ago at a wine tasting event at the Woodland Park Zoo, after trying (and loving) their R.H.D. red blend. Based on the R.H.D., we knew that we needed to visit their tasting room in Woodinville. So? We did. As it turns out, Jeff and Sheila Jirka can’t make a bad bottle of wine. And they keep proving it.

Every time we’re in Woodinville we stop by to see the Jirkas and taste their delicious wines. They recently started a wine club and we signed up without hesitation. We signed up for the three bottle allocation and we always get a few extra bottles. It’s just so good.

Davenport released their spring wines last week and Brandon and I ventured across the water to sample them at the release party. Our report? We loved ’em! The whole evening was great. Great food, great people and great wine!

Davenport Cellars spring release

Davenport Cellars spring release

Their new wines include: Sauvignon Blanc, Snowflake (a new vintage of their Sauvignon Blanc/Semillon blend), Rose de Cabernet Franc, Orange Muscat and Meritage Blanc. More on the specific wines here.

We couldn’t wait to enjoy the new wines, so we didn’t! After a long day of working in the yard on Saturday, we chilled a bottle of Sauvignon Blanc and enjoyed it with some Copper River salmon for dinner with my parents on the patio. They paired perfectly together!

Last week was a big week for our friends at Davenport Cellars. Along with their spring release, Davenport Cellars won big at the Seattle Wine Awards! Their 2009 Continuity (Brandon’s favorite, along with the Cabernet Franc) and 2009 Merlot (we haven’t had this one yet! It’s aging in our cellar) both received Double Gold Medals, and the 2009 R.H.D. (still my favorite!) received a Gold. Boy do we know how to pick wineries!

Next time you find yourself in Woodinville, definitely stop by Davenport Cellars and sample all of their wines — reds and whites!

Long weekend success!

Last week I detailed my very ambitious plans for the long Memorial Day weekend. The weather didn’t really cooperate and most projects took longer than I expected, but all in all, I’m quite proud of all of the work we did.

Our ambitious original list: (Updates/commentary in bold)

  • Buy all of the components for the pizza oven (just in case it doesn’t rain!) <– We hope to finish the design this week and look at sourcing our bricks and insulation boards and blankets (Who knew, right!?)
  • Build the pizza oven base and secure the steel sheet <– Way easier than we expected. Just heavy. (And even then, it was mainly Brandon!) 
  • Repair (re-do) the step under the new stairs in the backyard (concrete blocks and bricks) <– I think I have most of the necessary project components, but ran out of time — I blame the old cement and rebar that we spent an hour trying unsuccessfully to dig out.
  • Put up the bistro lights (!!!)  <– LOVE! LOVE! LOVE! Let the patio parties commence! 
  • Cut the wine barrels in half (If it works: stain and remove rust and figure out what to plant) <– Major success on this one. HOWEVER, it took WAY longer than I expected it to. I’m excited to start on the tutorial and share it with my faithful readers, likely in next week’s Wine Wednesday post. Check back on June 5.
  • Take a trip to the dump, if there is time  
  • Paint the new trim in the living room, touch up the wall paint <– I had too much fun celebrating birthdays and visiting with family. I’ll get to it one of these days… 
  • Paint the new bathroom baseboards <– Ditto
  • Caulk the hallway siding <– Ditto
  • Paint the ceiling patch in the hallway <– Ditto
  • Put the extra hardy board siding on Craigslist/take it to the dump <– Dump run!
  • Buy some Copper River salmon and cedar plank it on the grill. (YUM! One of my favorite culinary times of the year!) <– We shared the deliciousness on Sunday’s Long Weekend Progress Report post

And now? I’m exhausted. I need a weekend from my weekend. Time to relax on the couch with the cats.

I’ll leave you with the latest from Megan’s Island: our backyard! At least all this rain is good for something! Most of those plants were planted in the last month!

Backyard

Hello, gorgeous. I love our backyard!

Have a great week!

No stain, no gain

Brandon and I took advantage of the nice weather recently and dedicated some quality time to the new stairs and lower deck.

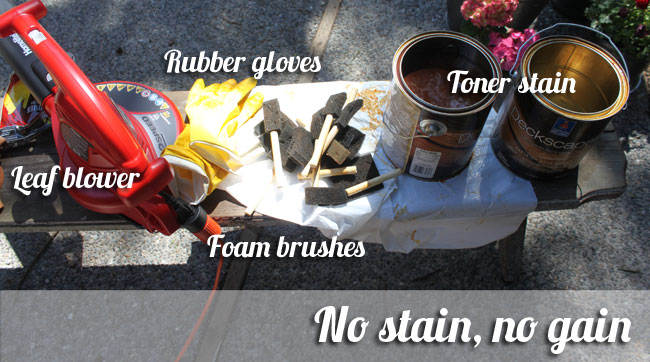
So what did we do? We woke up early, grabbed our 30 percent off coupon and headed down to Sherwin Williams for some deck stain. Oh yeah, deck stain. You know what they say, right? No stain, no gain. “They” don’t really say that, but they probably should, since a little preventative staining helps keep the deck in tip-top shape from sun and water damage.

Before2

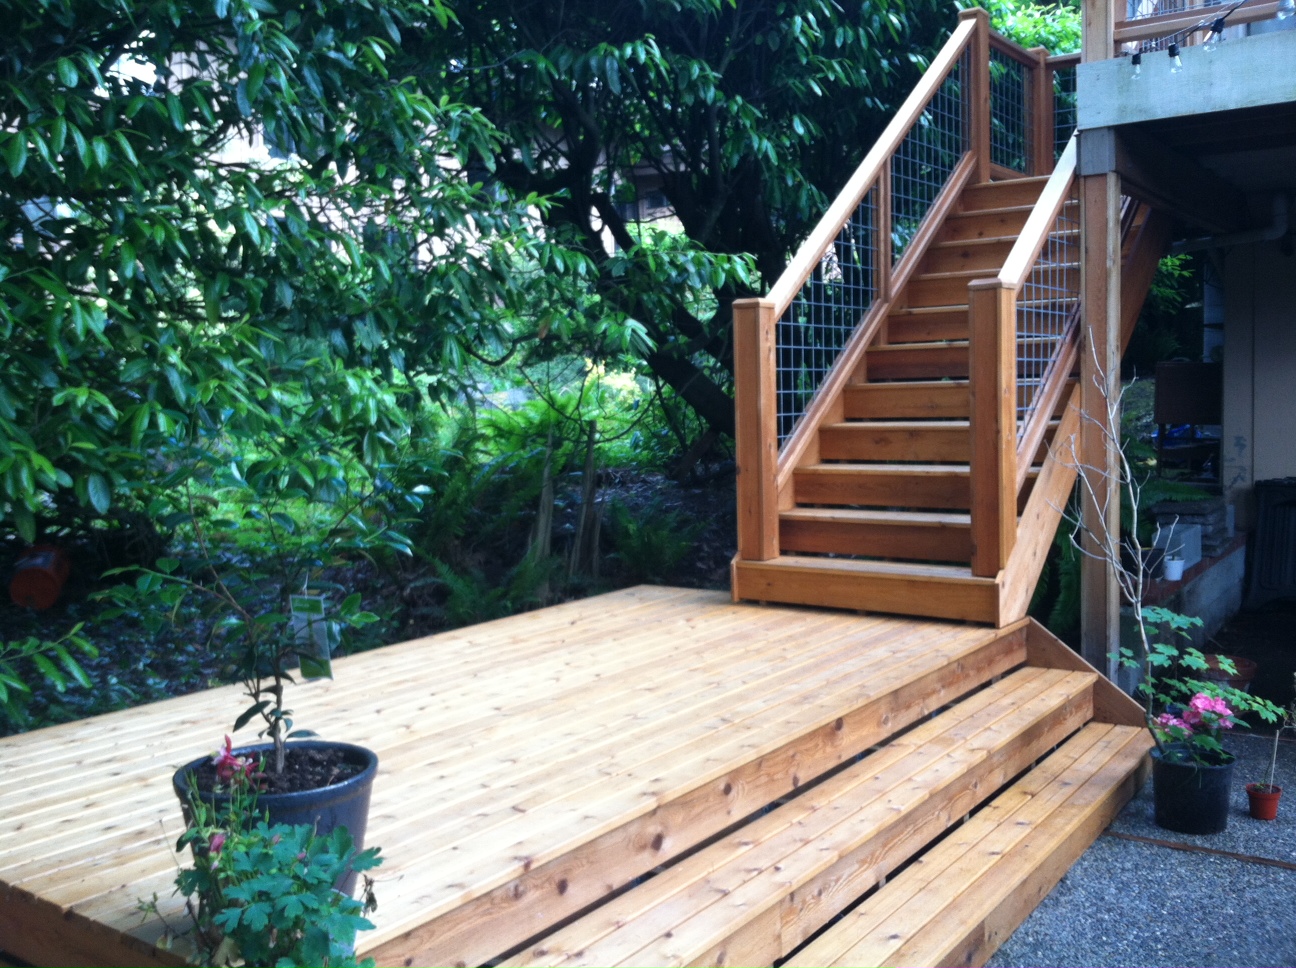
The lower deck is a knotty cedar, so we wanted to keep the stain pretty natural and let the grain of the wood really shine. We were mainly looking for the water and sun protection and help in blending the looks of the new and old decks. And? Success.

Natural Oil-Based Toner

Natural Oil-Based Toner

We bought two gallons and ended up using the Sherwin Williams Deckscapes Exterior Oil Toner Stain in Natural. We were hoping for the water-based toner, which they’ve advertised, but only a handful of stores in the STATE carried it. So, oil it was. We used this stain. It ended up costing ~ $35 per gallon with the coupon.

While we were at Sherwin Williams we also bought a paint pad, specifically used for painting/staining decks. We had the other necessary accessories at home: disposable gloves, a 2.5″ paint brush, about 1 million (12 in actuality) foam brushes, a paint tray and a disposable liner, and a rag for cleaning up and wiping off the stain, once it had set in.

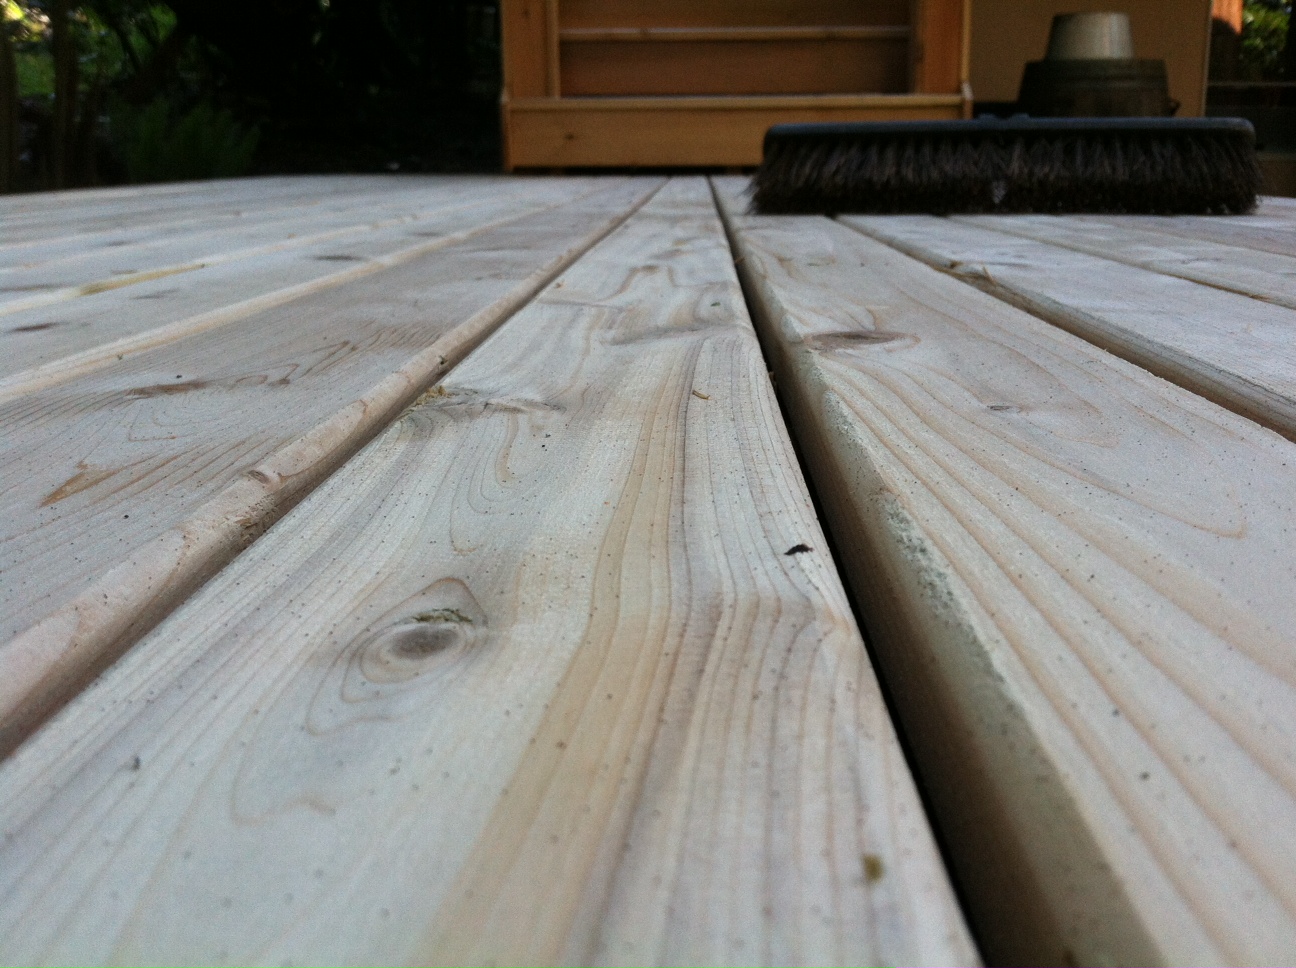
In anticipation of our nice weather, Brandon cleaned with deck with 30-second outdoor cleaner and we let it dry for 12 hours. Boy was it clean!

Before...

Before…

I haven’t had any staining experience and Brandon has had lots, so I took his cue on what to do. It was pretty simple: cover all of the wood with stain (don’t let it pool), wait for it to dry, and wipe off the excess. And, try not to get any on yourself. (I failed in that regard.)

First, collect your supplies and re-clean the space you’re going to clean. We have two big trees in the backyard, so quite a bit of debris had fallen in the 12 hours since the last big cleaning. We used our fancy new leaf blower. Here are the other supplies you’ll need. Please note that essentially nothing will be salvageable from this project. The stain is so sticky that everything will need to be thrown away. Make sure you use good disposable gloves.

Tools

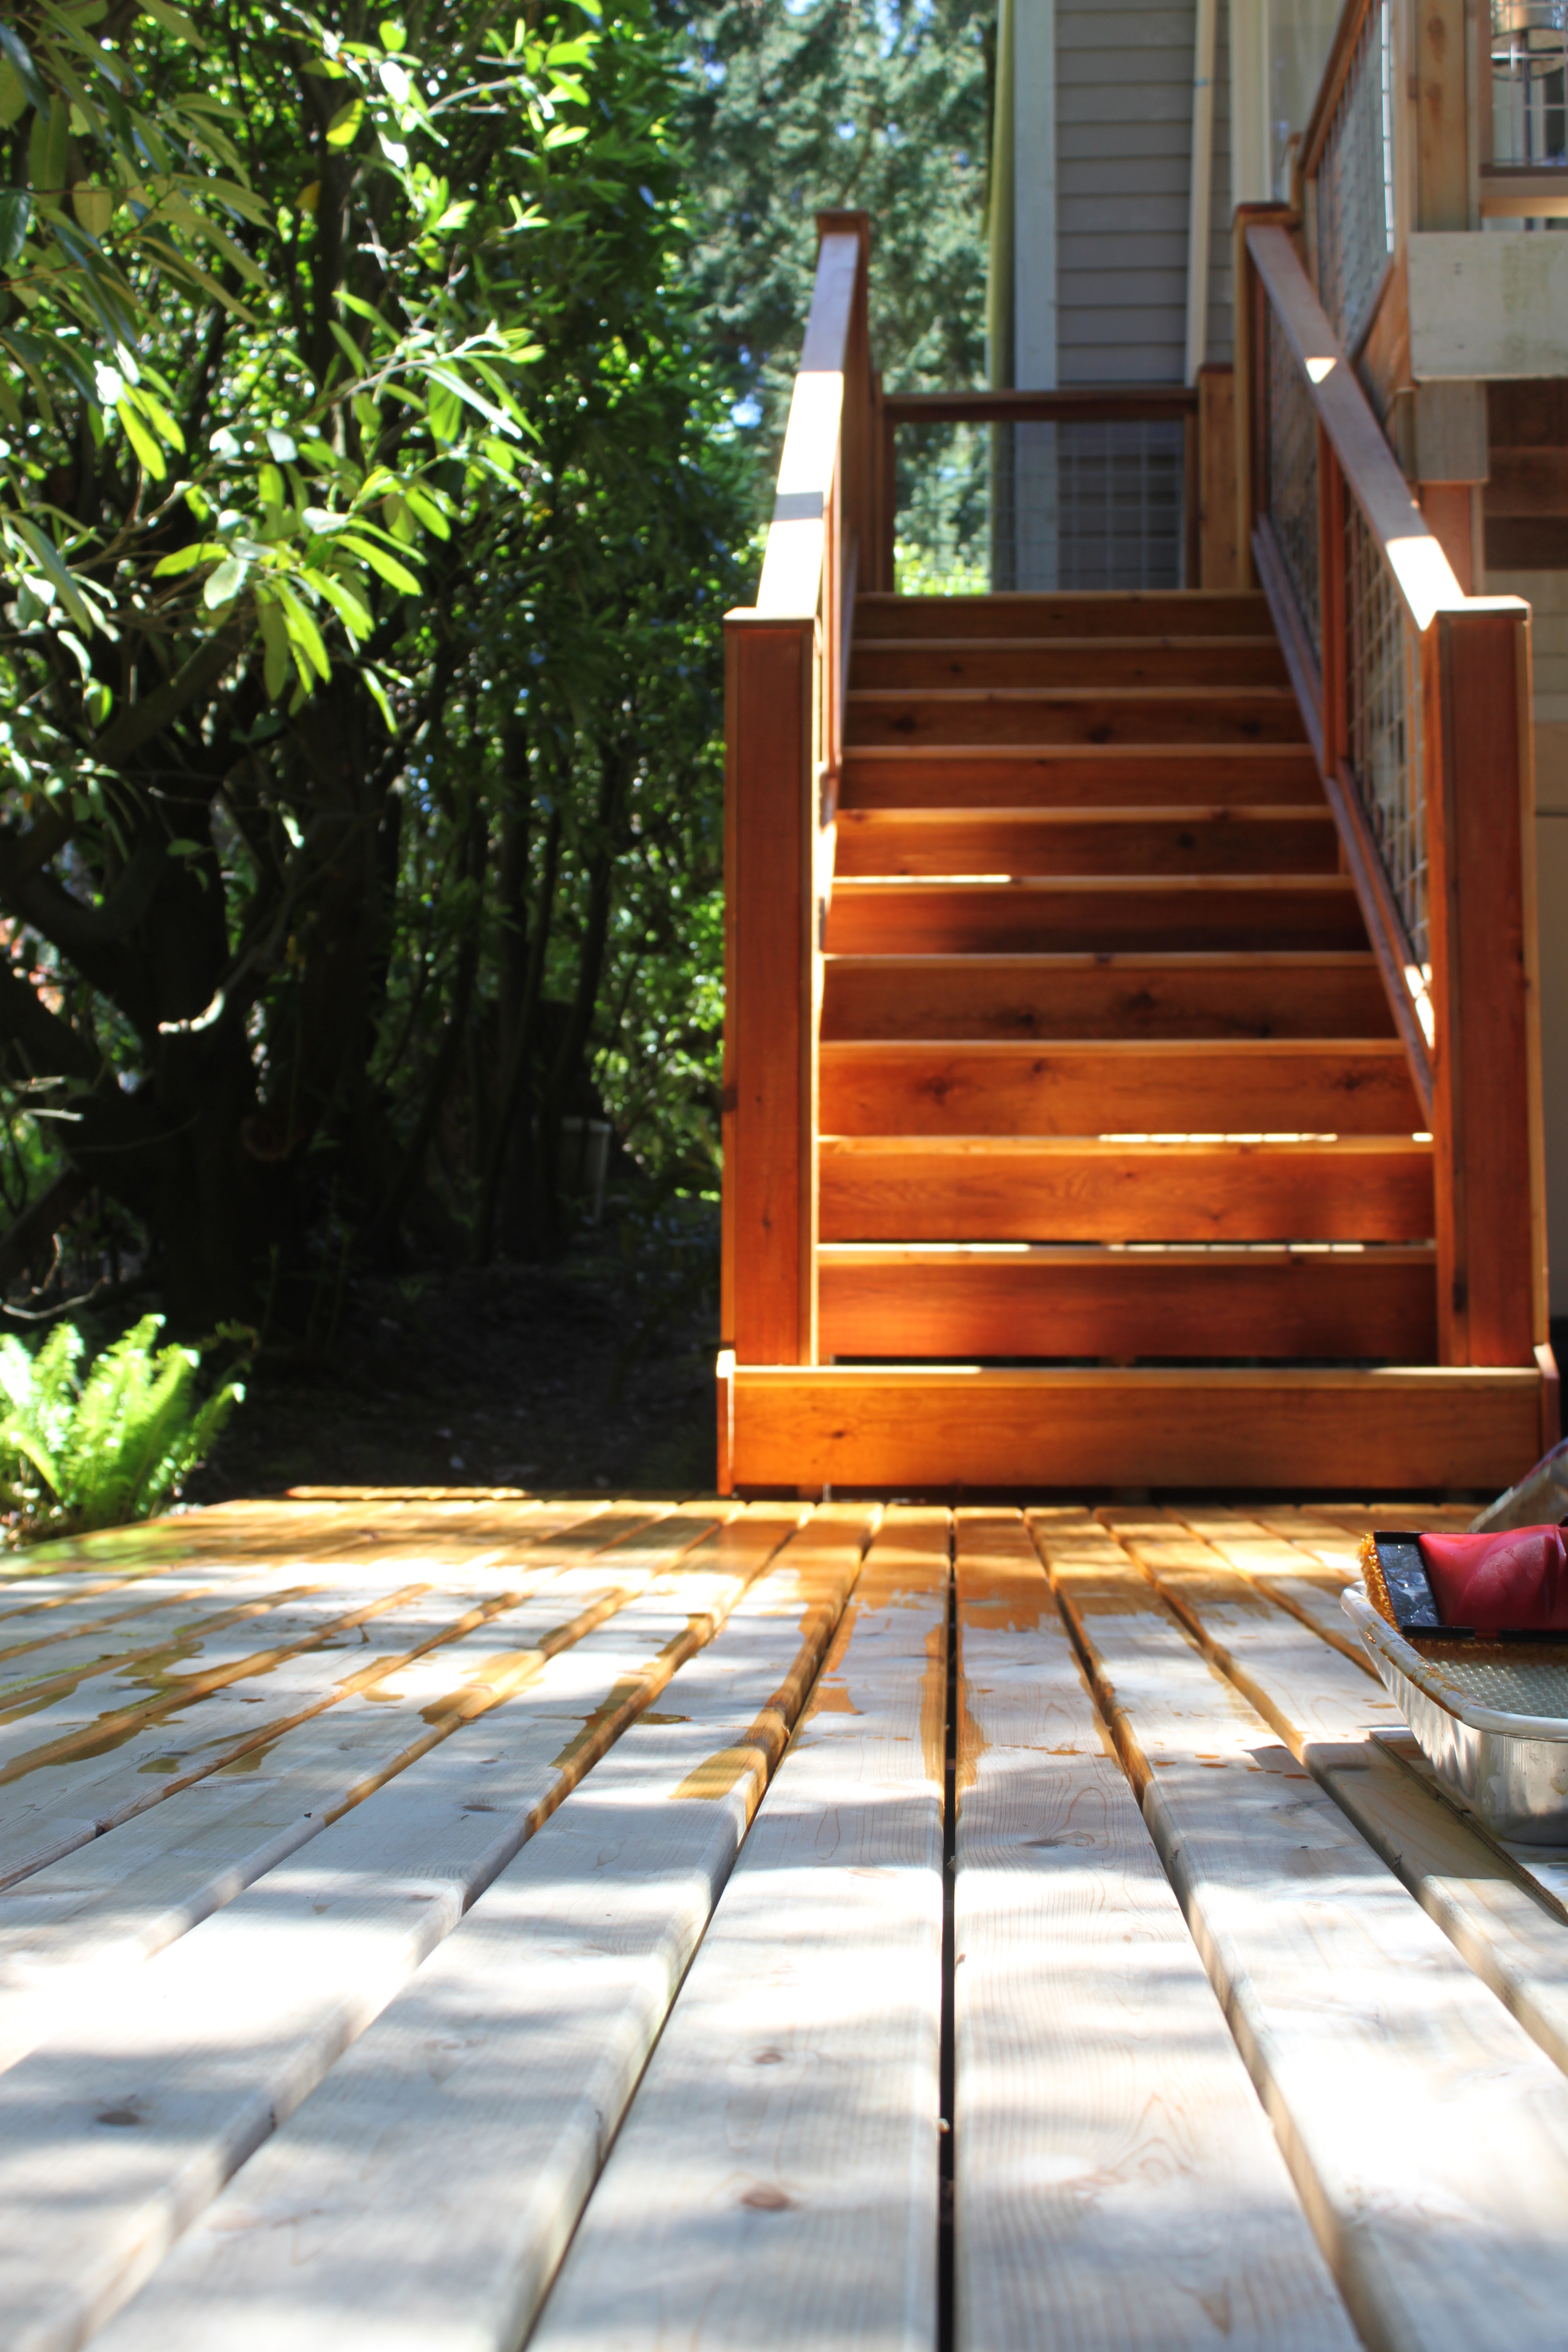
We started with the stairs and worked our way down, wiping extra stain off of the metal grid as we went. Staining took a lot longer than I expected. I think the stairs, railing and the lower deck took us three hours. It’s really not that long, but compared to my favorite pastime of spray painting, for-real painting takes an ETERNITY! Not really, but you know.

Staining, staining, staining...

Staining, staining, staining…

We started off with the normal 2.5″ paintbrush in trying to get on both sides of the railing. It didn’t work. Luckily, I had a million-pack varying sized foam brushes. (I only needed a few for a separate project, but the million-pack was such a deal, I bought 20 instead of two. Good thing I’m so resourceful and my craft room is so organized!)  The foam brushes did just the trick, but unfortunately didn’t last all that long. We used all one million (10 or so) on the stairs and deck. Pretty minimal investment for such return.

For the long, straight pieces (think railing and decking), we used pole-mounted sponge pad applicator that looked a lot like a larger version of the tool I normally use to edge paint on walls and trim. This new tool worked great, but the sponge pad kept slipping off of the applicator. It was pretty annoying but didn’t seem to effect our work. For the long decking, we used the foam brushes to spread the stain between the decking and then used the  paint pad with large, long brush strokes. This was a genius idea and I’m glad that I had it.  Once the stain was applied, we went back over it with a rag and removed it. More success!

Deck

The final product! That’s a well-stained deck!

Now for that sun to come back, so we can head down those freshly-stained stairs and enjoy the backyard and patio!

Progress report: Long weekend list making

Here is our list from earlier in the week… so far, so good! We’re making great progress on the yard and various projects and I’m excited to share them with you all once they’re all finished.

  • Buy all of the components for the pizza oven (just in case it doesn’t rain!) <– We’re still in the design phase, but hope to finish the design this weekend and order all of our bricks
  • Build the pizza oven base and secure the steel sheet
  • Repair (re-do) the step under the new stairs in the backyard (concrete blocks and bricks) <– We bought the blocks and will tackle this project today
  • Put up the bistro lights (!!!)
  • Cut the wine barrels in half (If it works: stain and remove rust and figure out what to plant) <– This worked so well! I’m actually heading down to sand the rough edges and clean up the barrels after I post this! 
  • Take a trip to the dump, if there is time 
  • Paint the new trim in the living room, touch up the wall paint <– It’s pretty rainy right now, so this looks like an afternoon project for today
  • Paint the new bathroom baseboards <– Ditto
  • Caulk the hallway siding <– Ditto
  • Paint the ceiling patch in the hallway <– Ditto
  • Put the extra hardy board siding on Craigslist/take it to the dump
  • Buy some Copper River salmon and cedar plank it on the grill. (YUM! One of my favorite culinary times of the year!) <– We had my parents over for dinner last night. The salmon did not disappoint! 

Since everyone loves photos, check this one out. We had my parents over for dinner last night, to thank them for all of their help with the backyard and ‘rental’ of their SUV yesterday. We cedar-planked a filet of Copper River salmon and grilled some corn on the cob and zucchini. We enjoyed it with a Caesar salad and a bottle of Davenport Cellar‘s 2012 Sauvignon Blanc. Everything was delicious and totally hit the spot.

salmon: it's whats for dinner

A nice reward for a long day of hard work.

Many, many more photos of ongoing and finished projects to come! Now tell us, have you had weekend project success? Share in the comments below.

{WINE WEDNESDAY} National Chardonnay Day

WineWednesdayTomorrow is a very special day: National Chardonnay Day!

I’ve recently discovered that Chardonnay is my least favorite wine, but that doesn’t stop me from trying to enjoy it from time to time.

Here is an enjoyable spring dinner that would pair perfect with the Chardonnay of your choice, based loosely on this Williams Sonoma salmon tacos recipe. We enjoyed ours with an Efeste Lola Chardonnay, which has scored excellently with Chardonnay lovers and experts.

Efeste Lola Chardonnay, salmon tacos

Happy Wine Wednesday!

For the fruit salsa…

  • Chop up a mango, avocado, and strawberries. (About 1 cup of each)
  • Add one chopped shallot and about a cup of chopped cilantro. Add some white balsamic vinegar and lime juice. 
  • Let the salsa sit and marinate in its own juices.  

For the guacamole…

We love, love, love guacamole, so when given the opportunity, we make it.

  • 2 avocados (we plan 2/3 an avocado per person, if we’re getting really crazy, Brandon will drizzle the halves with olive oil and broil them open side down until they’re a little charred)
  • 1 tablespoon minced garlic
  • A few drops of Tabasco
  • A pinch of aleppo pepper
  • 1/2 – 1 tablespoon of lime juice
  • A pinch of salt and pepper
  • Blend all ingredients together (Brandon likes to use this tool from Crate & Barrel for his guac making)
  • Sample often to make sure that it’s the best guacamole ever.

For the salmon…

  • Plan on using about 1/3 lb of salmon filet per person
  • Keep the skin on and remove the bones from the salmon. I use a pair of needle-nose pliers and they work perfect. We have a pair specifically for the kitchen. 
  • Pat the salmon dry and rub it with a seafood rub. Our favorite is Tom Douglas’ Salmon Rub with Love.
  • Grill the salmon, skin side down, until its opaque throughout
  • Let the salmon cool (just a bit), removed the skin and cut it into large chunks. Place the chunks on some warmed corn tortillas, garnish and enjoy! (We served our tacos with a side of white beans…) 
Salmon tacos

Happy Wine Wednesday!

Crack open a bottle of wine and enjoy your Wine Wednesday!

Long weekend list making…

With our home to-do list swirling around my head in anticipation of the long weekend, I’ve got lots and lots to think about. The weather reports are undecided on whether its going to rain or not, so I have ideas of both indoor and outdoor projects.

Weather dependent, our grand weekend plans will hopefully include:

  • Buy all of the components for the pizza oven (just in case it doesn’t rain!)
  • Build the pizza oven base and secure the steel sheet
  • Repair (re-do) the step under the new stairs in the backyard (concrete blocks and bricks)
  • Put up the bistro lights (!!!)
  • Cut the wine barrels in half (If it works: stain and remove rust and figure out what to plant)
  • Take a trip to the dump, if there is time
  • Paint the new trim in the living room, touch up the wall paint
  • Paint the new bathroom baseboards
  • Caulk the hallway siding
  • Paint the ceiling patch in the hallway
  • Put the extra hardy board siding on Craigslist/take it to the dump
  • Buy some Copper River salmon and cedar plank it on the grill. (YUM! One of my favorite culinary times of the year!)

What do you think? Think we’ll have enough to do over the long weekend?!

{Wine Wednesday} Custom wine glasses

More wine crafts! (Two of my favorite things: crafting and wine!)

Wine Wednesday custom wine glasses

Wine Wednesday custom wine glasses

My sister got married last fall and as I was planning her wine tasting bachelorette party, I came across some great ideas for the party, including these custom wineglasses.

Besides being the easiest things ever to make, these have unlimited options for customization. I’m thinking it would be so fun to make some bright pink ones for another bachelorette party or some gilded ones for the holidays and New Year’s Eve. I also have some small juice glasses that I was going to use for tea lights at my wedding that I’d like to customize for parties — now just to choose which parties and colors!


These custom glasses can be created in just a few simple steps:

  1. Gather your supplies: the glasses you plan on painting, painters tape, primer spray paint, a can of your favorite color of spray paint (I used chalkboard this time).
  2. Wash the glasses thoroughly and tape off the area you’d like to spray paint. I used 1″ wide painters tape and taped 1/2″ or so above the base of the glass.
  3. Once all of the glasses are taped, use the primer spray paint to thoroughly coat the area you want to paint. Wait several hours, as dictated by the brand you’re using.
  4. Next, repeat step three with the spray paint color of your choice. Keep your spray even and about 6″ away from the glass. Let it dry for 24 hours or so on top of some wax paper in a box. I didn’t have to paint the bottom of the glasses, but it you do, that should be a fourth step with similar spraying and drying guidelines.

I’d recommend buying your glassware at Ross,  Marshall’s, TJ Maxx or HomeGoods. You can probably find them for $1 or less.

Try to customize your own glassware and report back on the colors you’ve chosen and the success of your work! I’ll do the same and check back soon! Happy Wine Wednesday!!

Happy Birthday Jackson!

Happy birthday Jack!

Happy birthday Jack!

I’m a pretty crazy cat lady and have tried to keep it under control on this blog… until now.

My little boy cat turned SIX today! He’s got a wild and crazy birthday planned: something fancy for breakfast and dinner, a day of relaxing on the couch, a few trips up and down the stairs and some quality time harassing Madison (his big sister cat), and lots and lots of snuggles with me.

Enjoy this trip down memory lane as I celebrate Jack’s sixth birthday and reminisce on the days when my little fluff ball first came into my life.

I love you, Jackson Cat Coppersmith Szerwo!

2013_5-Jack1

Jack the kitten

He started out looking a little devilish. Hence his name: Jack.
After the neighborhood terror at my parent’s house.

Cats cuddling

Bath time! Courtesy of Maddie

Cats sleeping

Nap time! Jack as a pillow.

Cats cats and more cats

Playing with his toys.

Instagrammed Jack to the cat

I love these cats!!
I love these cats!!
Sometimes I can get in on the snuggling too. I love cats-as-pillows!

Sometimes I can get in on the snuggling too. I love cats-as-pillows!

My Mother’s Day Brunch

I hope you all had a nice Mother’s Day (or Sunday, if that’s what you chose to celebrate)! Brandon and I went over to my sister and brother-in-law’s house for a homemade brunch with my Mom and Dad and my brother-in-law’s Mom and soon-to-be Step Dad. The food was delicious and the company was great.

With eight people in attendance, some with gluten and lactose intolerances, my sister and I got creative with the menu and really leaned on the flavors of the new spring fruits and veggies for our Mother’s Day Brunch Feast:

Brunch

  • Broccoli quiche with ham
  • Crustless spinach quiche with ham, mushrooms and goat cheese gouda
  • Homefries
  • Butter croissants (from Trader Joe’s freezer section – have you tried these? They taste amazing, are easy to make and are perfect for brunch! However, the ones we made for Sunday may have been in the freezer too long. They didn’t proof right but they tasted ok. We bought some other croissants to supplement them.)
  • Chicken and pork breakfast sausages (I normally get the Jennie O turkey breakfast sausages, but these were ‘healthier’ [less bad] for you. They were really good!)
  • Fruit salad with raspberries, strawberries, blueberries and pineapple with a pinch of mango sugar

And a MIMOSA BAR!

Here are a few photos and recipes that helped make our Mother’s Day celebrations shine…

Broccoli quiche with ham... Delicious!

Mimosa-barMimosa Bar

  • (2) Gigantic bottles of Cook’s Champagne (there are eight people, after all)
  • (1) bottle of Trader Joe’s Tangerine Juice (like orange juice, but BETTER!)
  • (1) box of Trader Joe’s Tropical Fruit Juice Box
  • (1) handful of the following: fresh blueberries, raspberries and strawberry slices

Follow these steps for a mimosa bar of your own:

  1. Cut and/or wash the berries. We did this the night before.
  2. Chill the Champagne/Prosecco in advance of the event. We put ours in the fridge the night before. I have heard that you shouldn’t chill wines or champagne for more than four hours, but this stuff is pretty medium quality and we’re adding juice, so it’s better that it be cold than super flavorful.
  3. Create an amazing display! We got a ton of serving dishes and trays when we got married a couple of years ago and I love getting them out. This was one of those occasions. We also rimmed the champagne glasses with some mango sugar. It was a wonderful touch.

Cheers!